Blog

Why Professional Tile and Grout Cleaning Is Worth Every Penny

When it comes to maintaining the pristine look of your tiled floors and surfaces, it’s easy to underestimate the value of professional tile and grout cleaning. Many homeowners opt for do-it-yourself methods, assuming they’ll save money in the long run. However, the reality is that investing in expert services can provide lasting benefits that far outweigh the cost. From extended durability to better health and aesthetic appeal, here’s why professional tile and grout cleaning is truly worth every penny.

Prolongs the Life of Your Surfaces

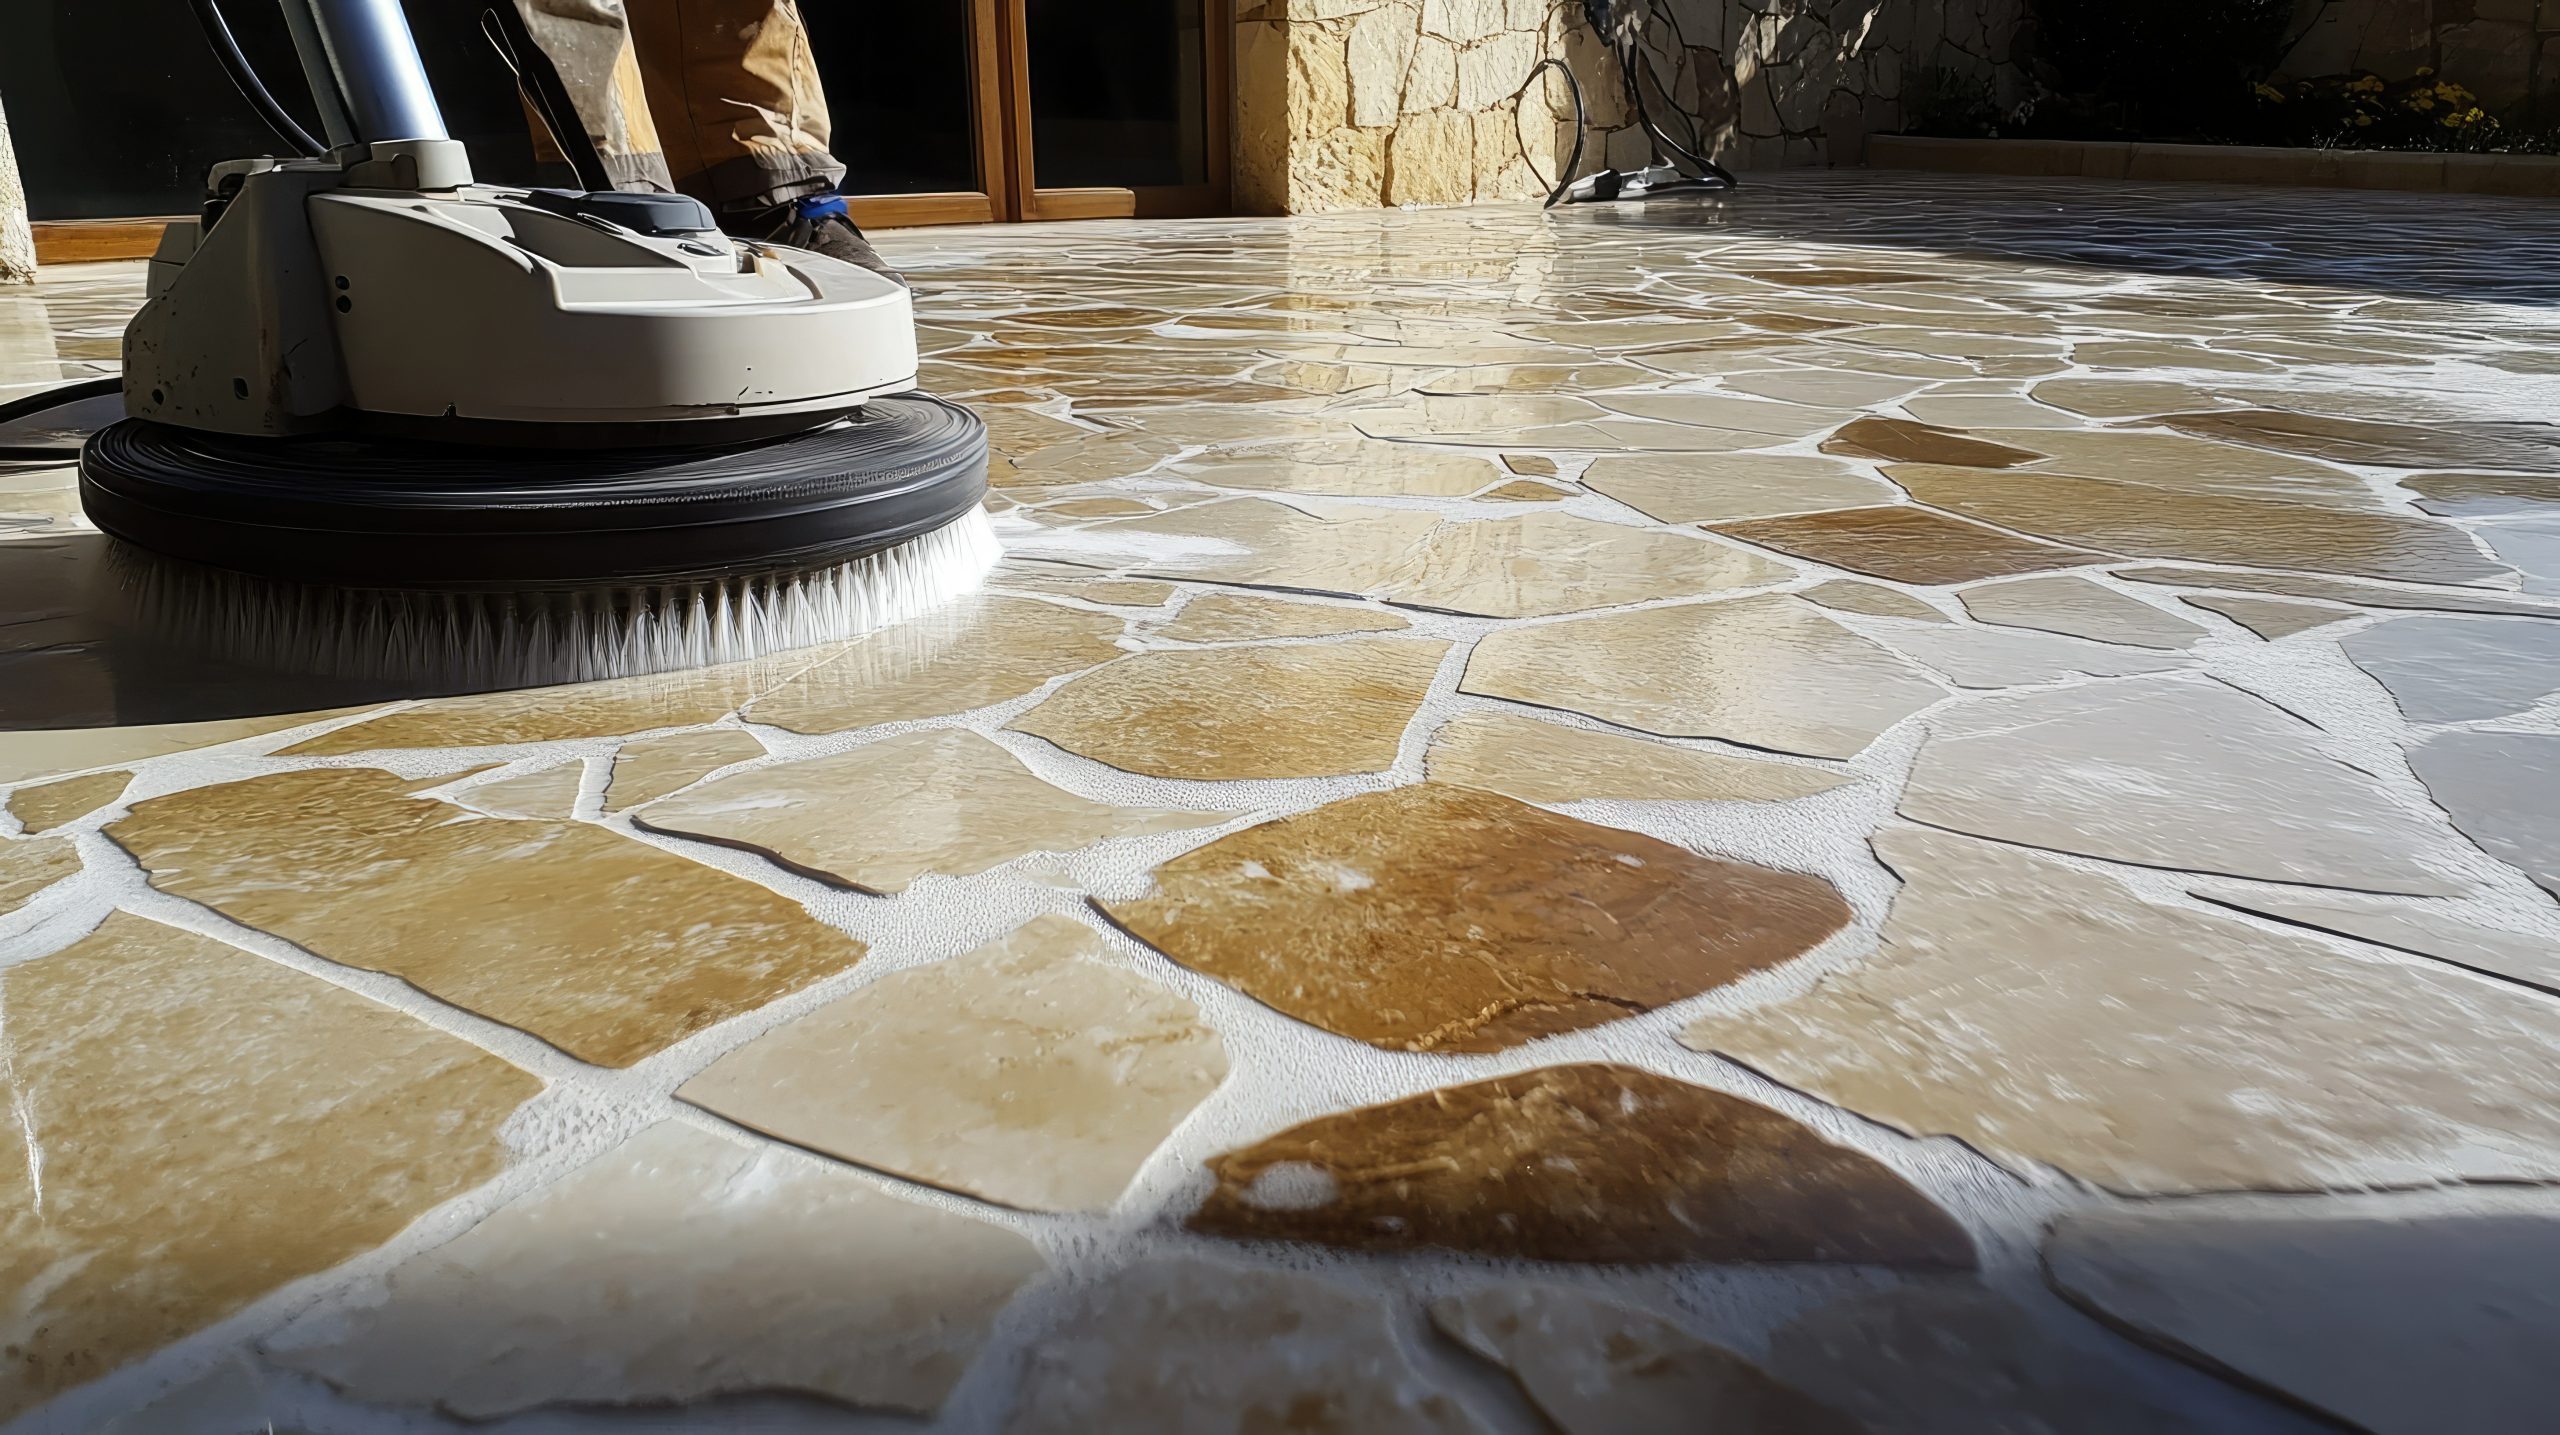
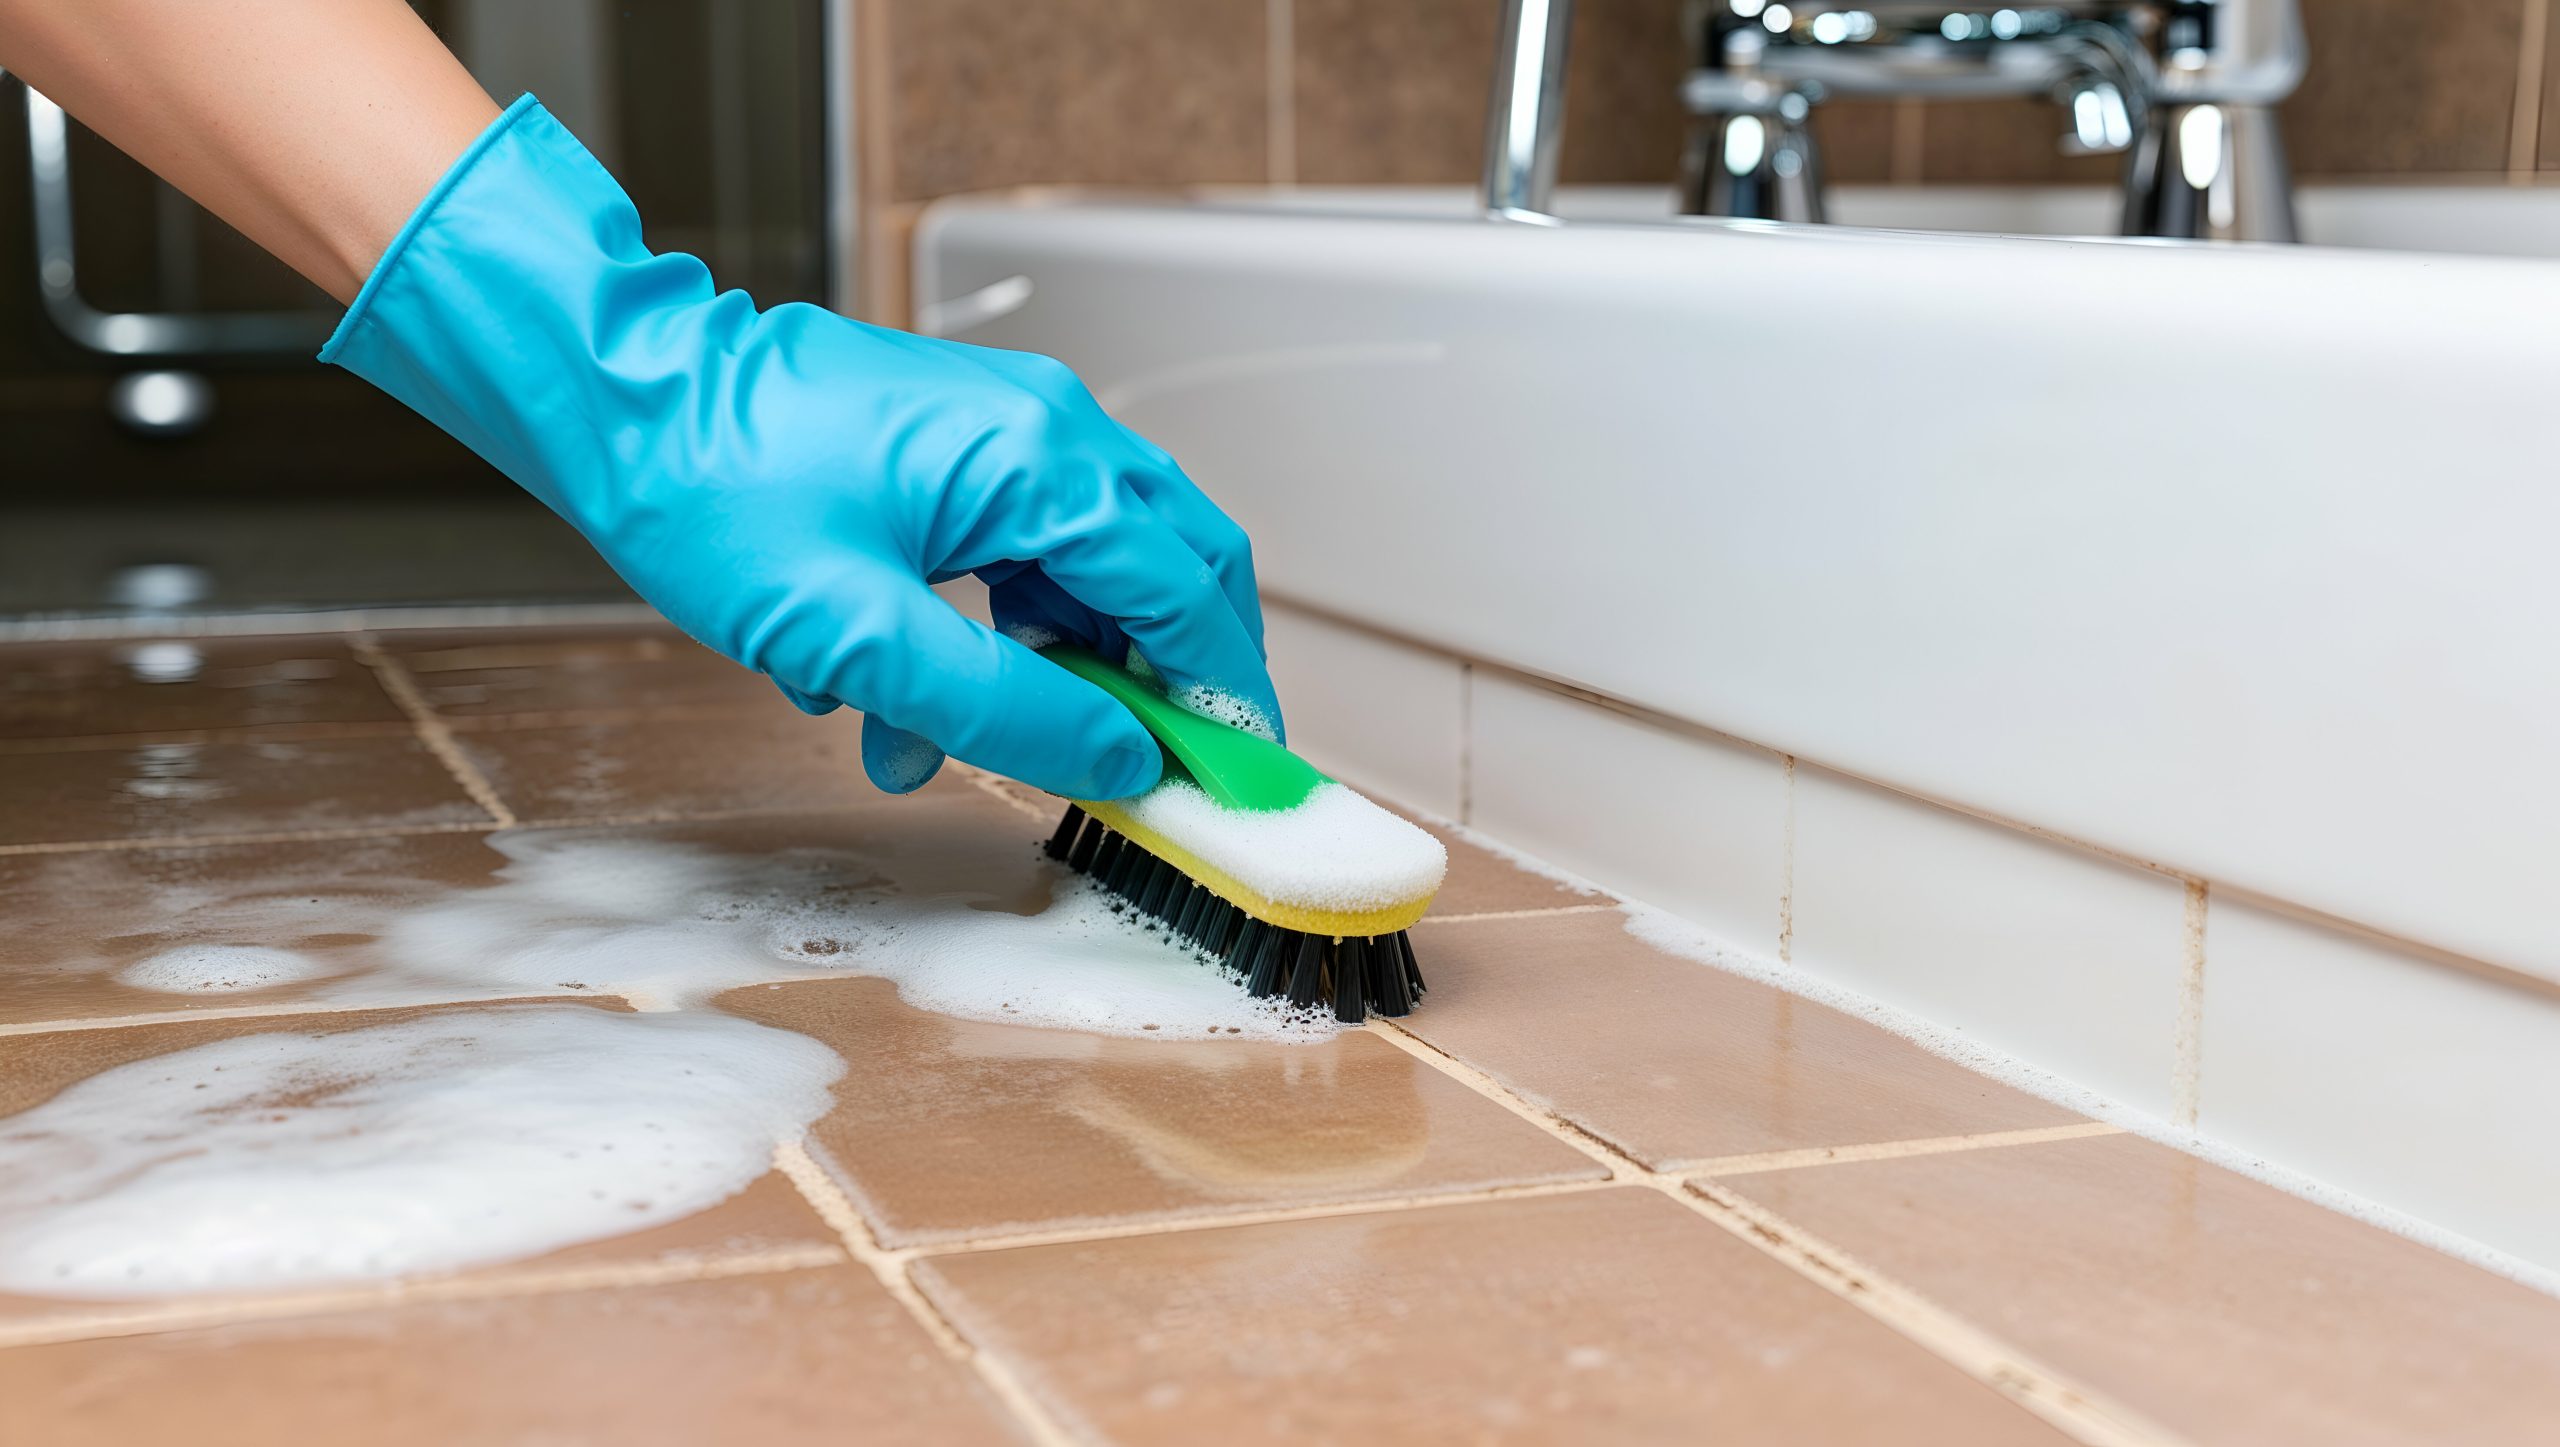
Tile and grout may seem indestructible, but over time, dirt, grime, and moisture can degrade these materials. DIY cleaning often involves harsh chemicals or abrasive scrubbing that can damage grout lines and wear down protective sealants. Professionals use industry-grade tools and solutions specifically designed to clean deeply without causing harm. This not only preserves the integrity of your surfaces but can also delay the need for costly repairs or replacements.

Improves Indoor Air Quality and Health

Grout is porous and easily absorbs bacteria, mold, and allergens. Without proper cleaning, these contaminants can pose health risks—especially for households with children, elderly residents, or allergy sufferers. Professional cleaners use powerful steam and extraction techniques to eliminate these hidden hazards, creating a healthier home environment. DIY methods rarely penetrate deep enough to achieve the same level of sanitation.

Saves You Time and Effort

Tile and grout cleaning is labor-intensive and time-consuming. What may take a homeowner an entire weekend to do (with mixed results), a professional can complete in a fraction of the time—with far superior outcomes. When you factor in the physical effort, cost of store-bought cleaners, and potential damage from improper techniques, it’s clear that outsourcing the job is not just easier, but smarter.

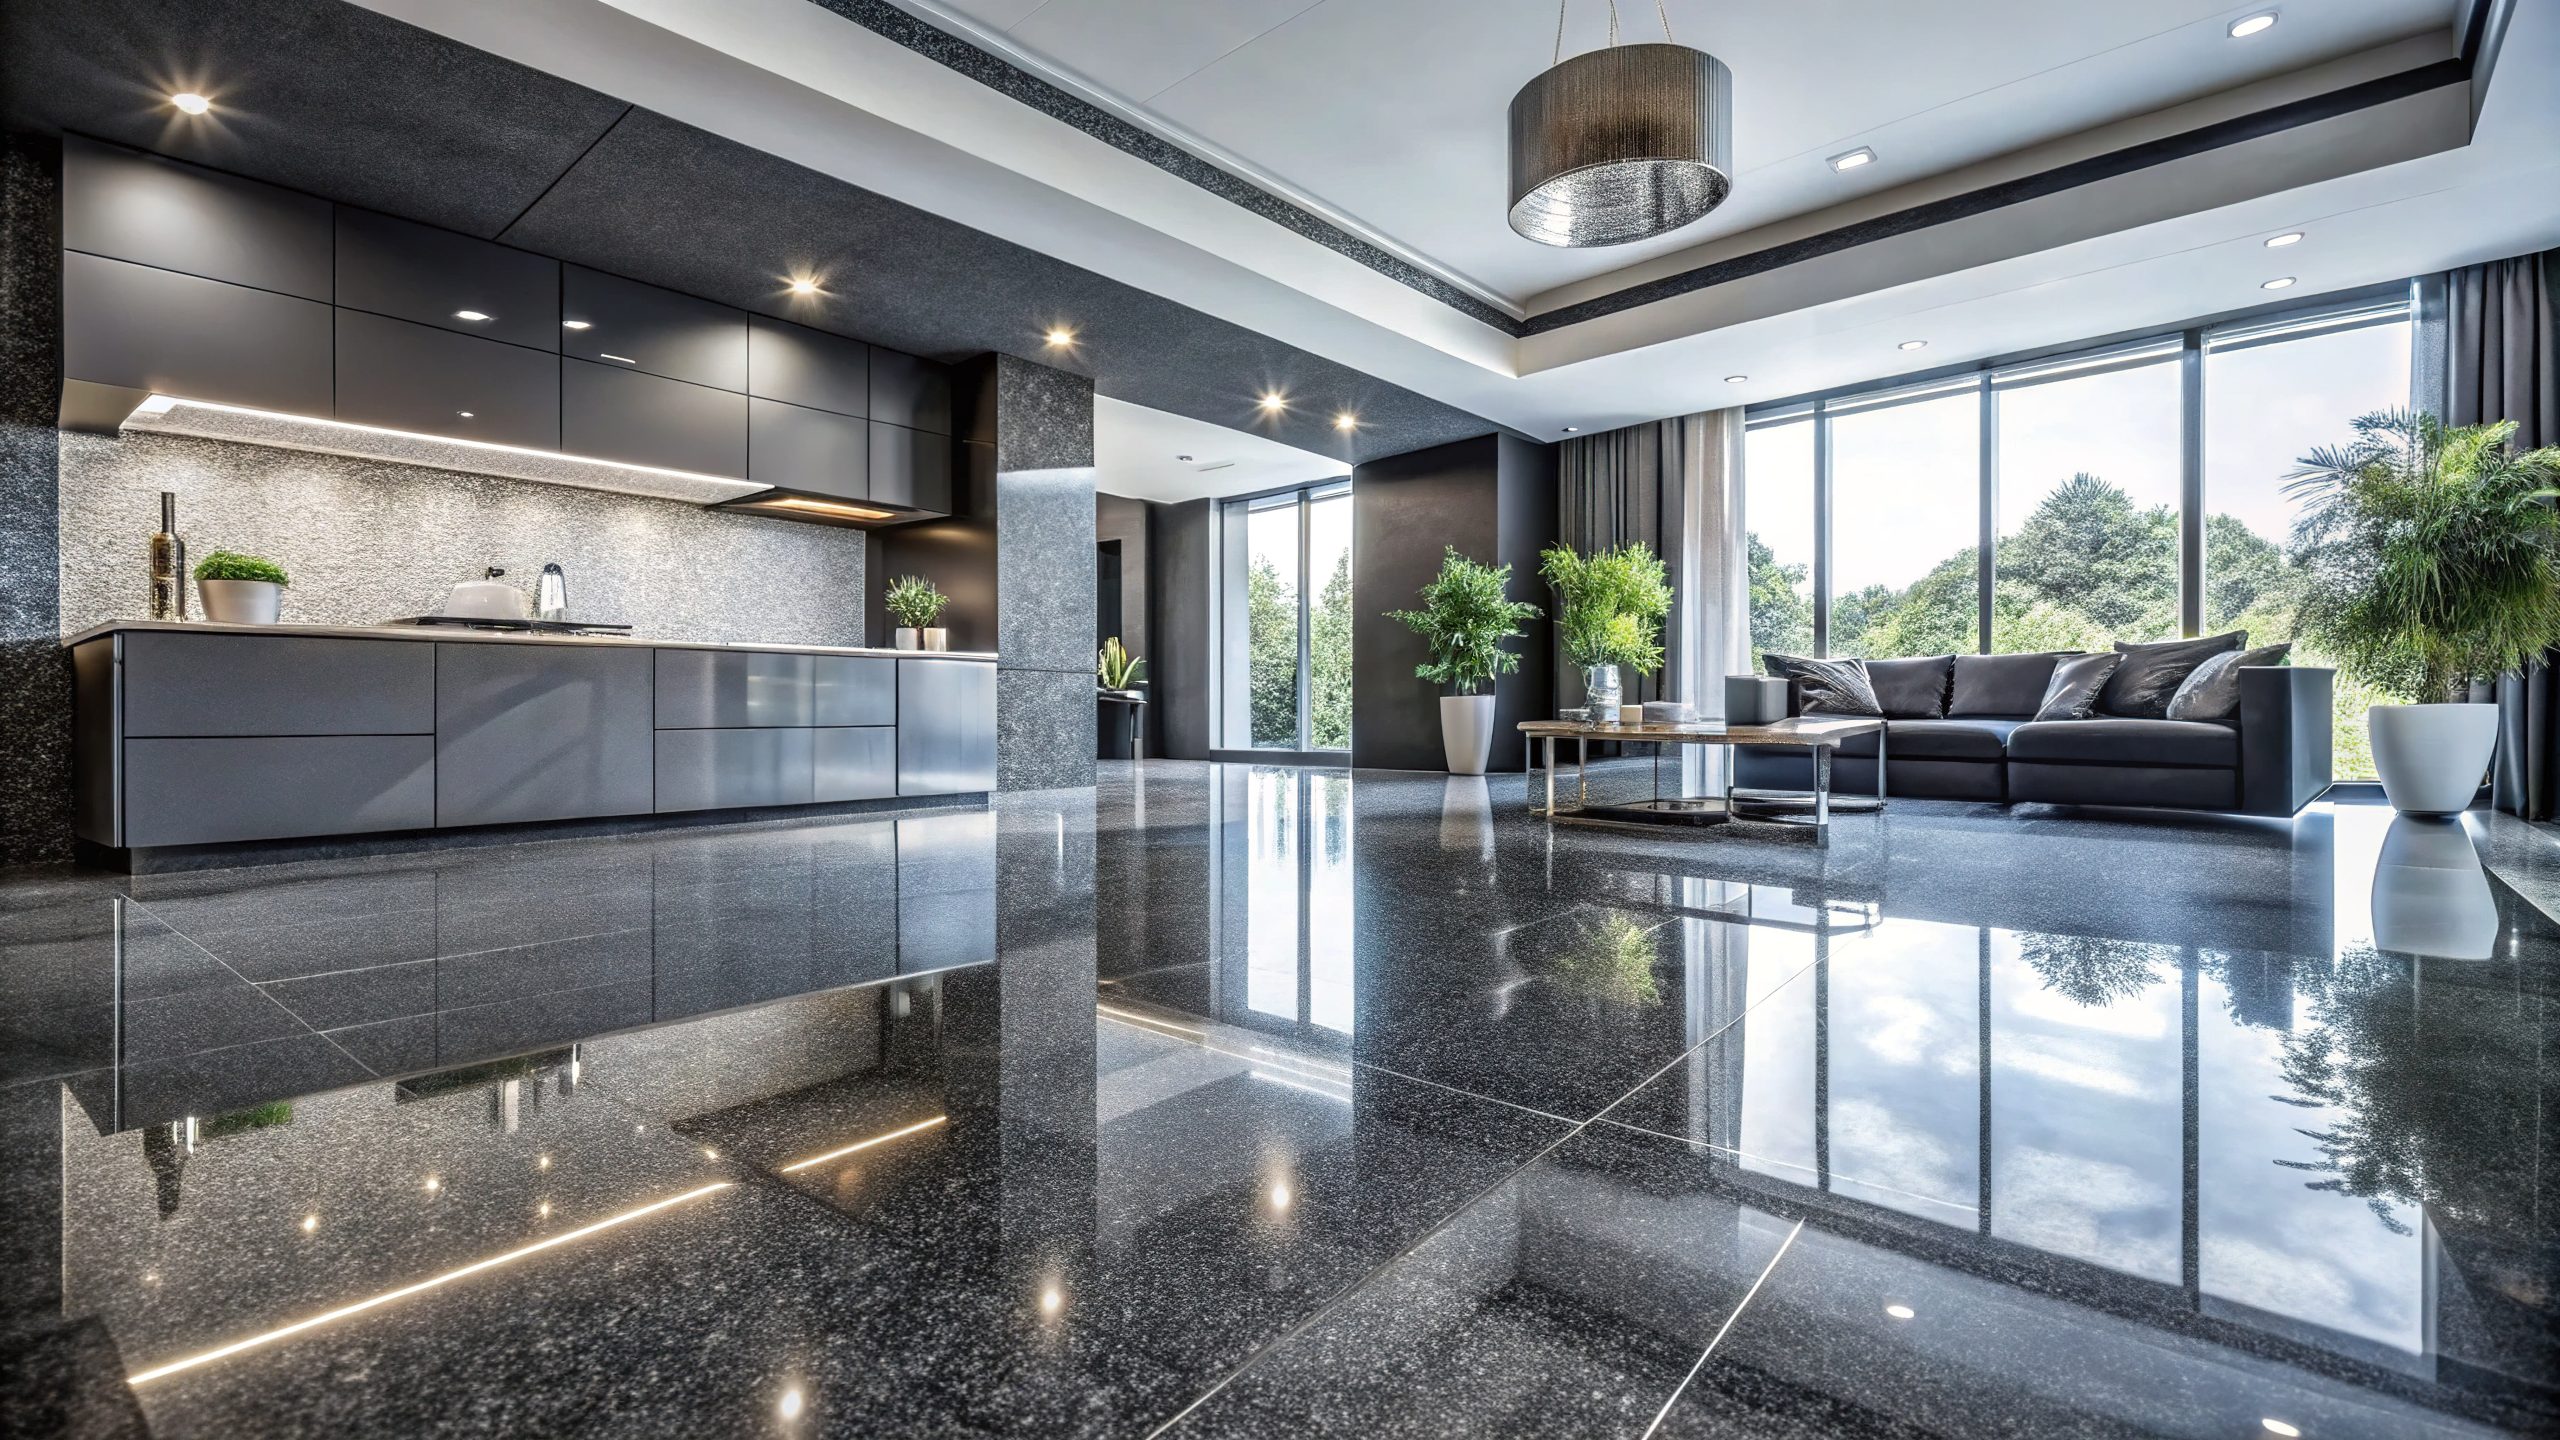
Restores the Original Beauty of Your Floors

No matter how much scrubbing you do, store-bought products often fail to fully restore grout to its original color or remove deeply embedded stains. Professional equipment can lift years of dirt and discoloration, making tile look brand new again. This has a major impact on your home’s aesthetic, enhancing the look and even increasing property value—especially important if you’re preparing to sell.

Provides Long-Lasting Results

Unlike DIY cleanings that need to be repeated frequently to maintain their effect, professional services often include sealing grout to repel future stains and moisture. This means your floors stay cleaner for longer, reducing the frequency and cost of future cleanings. It’s a one-time investment that pays off for months—sometimes years—depending on foot traffic and maintenance.


While DIY cleaning may seem like the cheaper option upfront, the long-term advantages of professional tile and grout cleaning make it a cost-effective and practical choice. From extending the life of your surfaces to improving health and home value, the benefits far surpass the initial expense. In short, professional tile and grout cleaning isn’t just worth the money—it’s an investment in your home’s future.

How Often Should You Clean Tile and Grout?

Tile and grout are some of the most durable and attractive surfaces in homes and commercial properties, but without regular maintenance, they can quickly become stained, dingy, or even moldy. So how often should you clean them? The answer depends on several key factors—your tile type, how often the area is used, and the kind of environment it’s in. Let’s explore expert recommendations for keeping tile and grout looking fresh and lasting longer.

Tile and Grout Cleaning Frequency by Room Type

Kitchens
Usage: High traffic, food spills, grease buildup
Expert recommendation:

  • Dry sweeping/mopping: Daily
  • Light surface cleaning: Weekly
  • Deep tile and grout cleaning: Every 2–3 months

Kitchens are some of the busiest and messiest rooms in any home or commercial setting. Grease, food particles, and high foot traffic mean tile and grout need frequent attention. For ceramic or porcelain tiles, a weekly mopping with pH-neutral cleaner works well, but grout should be deep-cleaned every 8–12 weeks to prevent staining.

Bathrooms
Usage: High moisture, soap scum, mold risk
Expert recommendation:

  • Quick surface wipe-down: 2–3 times per week
  • Thorough cleaning: Weekly
  • Deep grout cleaning and mildew treatment: Every 1–2 months

Due to constant humidity, bathrooms require more frequent grout maintenance. Mold and mildew can quickly develop if not treated proactively. Experts recommend using a daily shower spray and weekly scrubbing to keep grout healthy. In high-use bathrooms, sealing grout every 6–12 months adds an extra layer of protection.

Living Areas and Hallways
Usage: Moderate to high foot traffic
Expert recommendation:

  • Dry sweeping/vacuuming: 1–2 times per week
  • Wet mopping: Biweekly
  • Grout and tile deep clean: Every 4–6 months

Grout in living spaces can collect dust and debris, but because these areas are often less prone to moisture or staining, a biweekly mop and semiannual deep clean are usually sufficient.

Commercial Spaces
Usage: Very high foot traffic, various contaminants
Expert recommendation:

  • Surface cleaning: Daily
  • Professional tile and grout service: Monthly

Offices, restaurants, and other commercial environments see heavy wear and tear. To maintain a professional appearance and comply with cleanliness standards, commercial tile and grout often require more frequent, professional-level maintenance.

The Role of Tile Type

Different tiles also have varying care requirements:

  • Ceramic & Porcelain: Low maintenance; surface cleaning weekly and grout deep cleaning quarterly
  • Natural Stone (e.g., marble, travertine): Needs gentler cleaners and sealing every 6–12 months
  • Glass Tile: Easy to clean, but grout lines still need regular attention

A Maintenance Schedule You Can Follow

LocationSurface CleaningDeep Grout CleaningResealing (if applicable)
KitchenWeeklyEvery 2–3 monthsEvery 6–12 months
BathroomWeeklyEvery 1–2 monthsEvery 6 months
Living AreasBiweeklyEvery 4–6 monthsEvery 12 months
Commercial SpaceDailyMonthlyEvery 6 months

Final Tips from the Pros

  • Use soft brushes to avoid damaging grout lines.
  • Avoid harsh bleach-based cleaners for natural stone.
  • Steam cleaning is effective but should be done with care on sealed grout.
  • Hire professionals at least once a year for a deep reset, especially in moisture-prone areas.

Regular tile and grout maintenance is more than just cosmetic—it prevents damage, preserves value, and supports a healthier indoor environment. With a smart schedule and the right tools, your tile surfaces can look like new for years to come.

How to Restore the Shine to Dull and Etched Marble Floors

Over time, marble floors can lose their luster due to wear, acidic spills, and daily foot traffic. Unlike ordinary flooring materials, marble requires specific techniques to restore its natural shine and smoothness. This guide walks you through the most effective restoration methods—particularly honing and polishing—that can breathe new life into your marble floors.


Understanding Why Marble Loses Its Shine

Marble is a soft, calcium-based stone, making it highly susceptible to dullness and etching. Dullness usually results from surface wear and fine scratches caused by dirt and abrasion. Etching occurs when acidic substances like wine, vinegar, or citrus juices react with the marble, leaving cloudy or whitish spots. These issues can’t be fixed with simple cleaning—they require deeper restoration.


Step 1: Honing – Removing Surface Damage

Honing is the first major step in restoring etched and worn marble. This process involves using abrasive pads or diamond grits to gently grind down the damaged top layer of the marble.

  • What it does: Removes minor scratches, etch marks, and uneven spots
  • Tools used: Diamond abrasives or honing powders
  • Finish: Smooth, matte surface ready for polishing

Professional honing usually starts with a coarse grit and progresses to finer grits, depending on the level of damage. This step flattens the stone and evens out the surface, setting the stage for a brilliant polish.


Step 2: Polishing – Restoring the Shine

After honing, polishing is used to enhance the marble’s natural gloss.

  • What it does: Buffs and smooths the surface to bring out shine
  • Tools used: Polishing powders, pads, and floor buffers
  • Finish: High-gloss or satin sheen, based on preference

Polishing not only improves the visual appeal but also helps close the stone’s pores slightly, making it a bit more resistant to stains and moisture. This step is essential for achieving that sleek, mirror-like look.


Step 3: Sealing – Preserving the Finish

Once your floors are restored, sealing is crucial for protection.

  • What it does: Prevents staining and slows down etching
  • Application: A penetrating sealer is applied and left to cure
  • Lifespan: Typically 6–12 months, depending on foot traffic

Though not a cure-all, sealers give you more time to clean up spills before they damage the stone. Resealing periodically is key to maintaining that freshly-restored look.


Maintenance Tips to Keep Marble Floors Looking New

Restoration is just the beginning. Keep your marble floors shining with these upkeep tips:

  • Use pH-neutral stone cleaners – Avoid vinegar, bleach, or acidic solutions
  • Clean regularly with microfiber mops – This minimizes scratching from dirt
  • Wipe up spills immediately – Especially acidic or oily substances
  • Use mats and rugs in high-traffic areas – To reduce wear and tear

Proper care will help delay the need for future restoration and keep your marble looking pristine for years.


Final Thoughts

Restoring dull and etched marble floors involves more than a quick clean—it requires careful honing, thorough polishing, and long-term sealing. While DIY kits exist, professional services often provide the most reliable and lasting results. With the right techniques and ongoing care, your marble floors can regain their radiant beauty and continue to shine as the stunning centerpiece of your home.

Sealing Your Marble Floors: Why It’s a Must for Long-Lasting Beauty

Marble floors are a luxurious and elegant addition to any space, offering timeless beauty and durability. However, to maintain their stunning appearance, proper care and maintenance are essential—particularly when it comes to sealing. Sealing your marble floors is a crucial step in preserving their longevity, preventing stains, and enhancing their natural shine. In this guide, we’ll explore why sealing is a must, how often it should be done, and the best sealers for marble flooring.


Why Sealing Your Marble Floors Is Essential

Marble is a porous natural stone, meaning it can absorb liquids and stains if left unprotected. Unsealed marble is highly susceptible to etching, discoloration, and water damage, which can significantly reduce its lifespan. Sealing your marble floors offers the following benefits:

1. Stain Protection

Spills from coffee, wine, juice, or even water can penetrate marble if it’s not sealed, leading to stubborn stains. A quality sealer forms a protective barrier, preventing liquids from seeping into the stone.

2. Defense Against Etching

Marble reacts with acidic substances, causing dull spots or “etch marks.” While a sealer won’t completely prevent etching, it can slow down the damage and make the surface more resistant.

3. Moisture Resistance

In high-humidity environments, moisture can seep into unsealed marble, leading to mold growth and weakening the stone’s integrity. Sealing helps repel moisture and maintain the floor’s structural stability.

4. Prolonged Durability

Marble is a long-lasting material, but without proper protection, it can degrade over time. Sealing helps preserve its strength and beauty, reducing the frequency of deep cleaning and restoration.

5. Easier Cleaning & Maintenance

Sealed marble floors are much easier to clean. Dirt and grime remain on the surface instead of sinking into the pores, allowing for quick and effective cleaning with minimal effort.


How Often Should You Seal Marble Floors?

The frequency of sealing depends on several factors, including foot traffic, exposure to moisture, and the type of sealer used. Here’s a general guideline:

  • Low-traffic areas (bedrooms, formal dining rooms): Every 12–24 months
  • Moderate-traffic areas (living rooms, hallways): Every 6–12 months
  • High-traffic areas (kitchens, bathrooms, entryways): Every 3–6 months

To determine if your marble floor needs resealing, perform a simple water drop test:

  1. Place a few drops of water on the marble surface.
  2. Wait for 5–10 minutes.
  3. If the water absorbs into the marble and darkens the surface, it’s time to reseal.

Best Sealers for Marble Floors

Choosing the right sealer is crucial to ensuring maximum protection and longevity. Here are some of the best types of marble sealers:

Penetrating Sealers (Impregnating Sealers)

  • Designed to absorb into the marble and create a protective barrier from within.
  • Ideal for kitchens, bathrooms, and outdoor areas.
  • Provides long-lasting protection without altering the stone’s natural appearance.
  • Recommended Product: StoneTech BulletProof Sealer

Enhancing Sealers

  • Provides the same protection as a penetrating sealer but also enhances the stone’s natural color.
  • Great for those who want to deepen the marble’s hue and richness.
  • Recommended Product: Aqua Mix Enrich ‘N’ Seal

Topical Sealers

  • Forms a protective layer on the marble’s surface.
  • Offers additional shine but may require frequent reapplication.
  • Best for decorative marble floors that receive low foot traffic.
  • Recommended Product: Miracle Sealants 511 Seal & Enhance

How to Seal Your Marble Floors: Step-by-Step Guide

Sealing your marble floors properly ensures long-lasting protection. Follow these steps for the best results:

Step 1: Clean the Surface

  • Sweep or vacuum to remove dirt and dust.
  • Use a pH-neutral stone cleaner to wipe down the floor.
  • Allow the floor to dry completely before applying the sealer.

Step 2: Apply the Sealer

  • Using a clean microfiber cloth or applicator pad, apply the sealer evenly in small sections.
  • Avoid oversaturating the marble—thin, even layers work best.

Step 3: Let It Absorb

  • Allow the sealer to penetrate the marble (typically 5–15 minutes, depending on the product).
  • If necessary, apply a second coat for extra protection.

Step 4: Wipe Off Excess

  • Use a clean, dry cloth to wipe away any remaining sealer before it dries on the surface.

Step 5: Let It Cure

  • Allow the sealer to cure for at least 24 hours before walking on the floor.
  • Avoid washing or exposing the marble to moisture during this time.

Sealing your marble floors is one of the most effective ways to protect their beauty and durability. Whether your floors are in a high-traffic area or a more decorative space, regular sealing ensures they remain resistant to stains, etching, and moisture damage. By choosing the right sealer and following proper maintenance steps, you can keep your marble floors looking pristine for years to come.

For optimal results, consider enlisting a professional stone care service to handle sealing and maintenance, particularly for expansive or high-traffic areas. Proper upkeep now can save you both time and money in the long run while ensuring your marble floors retain their timeless elegance.

Preparing Your Natural Stone Floors for Special Events

Natural stone floors are a timeless and elegant feature that can enhance the beauty of any home or venue. When hosting a special event, ensuring that your floors are in pristine condition is essential to impress your guests and maintain their longevity. This step-by-step guide will help you deep clean, polish, and seal your natural stone floors so they look flawless for your upcoming occasion.

Step 1: Clear the Area

Before beginning the cleaning and preparation process, remove all furniture, rugs, and decorative items from the space. This will provide unobstructed access to the entire floor and prevent any damage to furnishings during the cleaning and sealing process. If moving heavy furniture, use furniture sliders to avoid scratching the surface.

Step 2: Sweep and Dust Thoroughly

Use a soft-bristle broom or a dry dust mop to remove loose dirt, dust, and debris. Natural stone is susceptible to scratches from dirt particles, so ensuring a clean surface before proceeding to deeper cleaning is crucial. Avoid using vacuums with hard plastic wheels or rotating brushes, as these can cause damage to the stone.

Step 3: Perform a Deep Clean

For an effective deep clean, use a pH-neutral stone cleaner specifically designed for natural stone surfaces. Avoid harsh chemicals, vinegar, or acidic cleaners, as these can etch and dull the stone. Follow these steps:

  1. Dilute the stone cleaner according to the manufacturer’s instructions.
  2. Use a microfiber mop or a soft sponge to apply the cleaner in sections.
  3. Allow the cleaner to sit for a few minutes to break down grime.
  4. Rinse thoroughly with clean water to remove any residue.
  5. Dry the floor with a soft, lint-free cloth to prevent water spots.

Step 4: Address Stains and Etching

For stubborn stains or etch marks, identify the type of stain first. Organic stains (such as food or wine) can often be lifted with a poultice made from baking soda and water. Oil-based stains may require a degreasing agent approved for stone surfaces. Apply the poultice, let it sit for 24 hours, and then gently remove it with a damp cloth.

Step 5: Polish for a Brilliant Shine

Polishing enhances the natural beauty of the stone and provides a smooth, reflective surface. Depending on the type of stone, you can use a stone-specific polish or a polishing powder. Here’s how:

  1. Apply a small amount of polish to a soft cloth or polishing pad.
  2. Work the polish into the stone using circular motions.
  3. Buff the surface with a clean, dry cloth to achieve a radiant shine.

Step 6: Seal for Protection

Sealing your natural stone floor is a crucial step in protecting it from stains, moisture, and wear, especially in high-traffic areas. Choose a high-quality sealer appropriate for your stone type (such as granite, marble, or limestone). Follow these steps for sealing:

  1. Ensure the floor is completely clean and dry.
  2. Apply the sealer evenly with a soft cloth or sponge applicator.
  3. Let the sealer sit for the recommended time before buffing away excess.
  4. Allow the sealer to cure fully before walking on the surface.

Step 7: Maintain the Look Until the Event

Once your natural stone floors are cleaned, polished, and sealed, maintain their pristine look leading up to your event by:

  • Using entry mats to prevent dirt from being tracked in.
  • Cleaning up spills immediately to prevent stains.
  • Dry dusting or damp mopping as needed.
  • Avoiding abrasive tools or harsh chemicals.

Final Touches

On the day of the event, do a final dusting and light polish to enhance the floor’s shine. Consider placing rugs in high-traffic areas to minimize wear and provide additional protection.

By following these steps, your natural stone floors will be event-ready, offering a dazzling and sophisticated ambiance for your special occasion. With proper care and maintenance, they will continue to impress guests for years to come.

For the best results and long-lasting protection, consider hiring a professional stone care service, especially if your floors require extensive restoration or sealing.

Seasonal Care for Natural Stone Floors: A Year-Round Maintenance Guide

Natural stone floors require consistent maintenance to preserve their luster and integrity. Seasonal changes bring different challenges, from moisture and grime in winter to dust and heat in summer. A year-round care plan ensures that your natural stone flooring remains in peak condition. Below is a seasonal maintenance guide to help you protect and maintain your investment throughout the year.

Spring: Deep Cleaning and Sealing

Spring is the perfect time for a thorough cleaning and protective sealing to refresh your natural stone floors after winter’s wear and tear.

  • Deep Clean: Sweep and vacuum to remove dirt and debris. Use a pH-neutral stone cleaner with warm water and a microfiber mop to eliminate any residual grime. Avoid acidic or harsh chemicals, which can erode the stone’s finish.
  • Inspect for Damage: Check for cracks, etching, or discoloration caused by winter moisture and salt residue. Address any damage early to prevent worsening.
  • Reapply Sealant: If your stone floors are porous (such as limestone or travertine), spring is an ideal time to reseal them. A quality sealant creates a barrier against moisture and stains, extending the floor’s lifespan.
  • Control Humidity: As temperatures rise, maintaining indoor humidity levels between 30-50% helps prevent stone expansion or contraction, which can lead to cracks.

Summer: Preventing Heat and Moisture Damage

Warm weather and increased foot traffic can introduce dirt, sand, and spills that can wear down your stone flooring.

  • Frequent Sweeping and Mopping: Sand and dirt particles can scratch the surface, so sweep daily and damp-mop weekly to prevent buildup.
  • Use Area Rugs and Mats: Placing rugs in high-traffic areas, such as entryways and kitchens, helps minimize wear and tear.
  • Avoid Direct Sunlight Exposure: Strong UV rays can fade some natural stones. Use blinds, curtains, or UV-filtering window films to protect your floors.
  • Wipe Up Spills Immediately: Stone surfaces can absorb spills, especially from acidic substances like citrus juice and wine. Use a soft cloth and a neutral cleaner to blot spills quickly.

Autumn: Preparing for Cooler Months

As fall brings cooler temperatures and increased debris from leaves and rain, take steps to reinforce your stone floor’s defenses.

  • Pre-Winter Cleaning: Conduct another deep clean to remove any summer grime and prepare the floors for harsher conditions.
  • Check Sealant Durability: If water no longer beads on the surface, reapply a sealant to prevent moisture absorption.
  • Increase Doormat Usage: Leaves, dirt, and moisture from autumn rains can stain and scratch stone. Use high-quality doormats inside and outside entryways to minimize tracking debris indoors.
  • Maintain Grout Lines: Inspect and clean grout lines to remove dirt and prevent mold growth, which thrives in damp conditions.

Winter: Protecting Against Moisture and Debris

Winter’s harsh conditions—snow, ice, and road salts—pose a significant threat to natural stone flooring. Prevent damage by reinforcing your floor’s protection.

  • Use Protective Mats: Place absorbent mats in entrances to trap moisture and salt before they reach your floors.
  • Clean Immediately After Snow and Ice Exposure: Salt and de-icing chemicals can cause etching and discoloration. Wipe floors with a damp mop and a pH-neutral cleaner to prevent buildup.
  • Avoid Harsh Cleaning Agents: Do not use vinegar, bleach, or ammonia-based cleaners, as they can degrade the stone’s finish.
  • Maintain Indoor Humidity: Winter heating can create dry indoor conditions, leading to stone contraction. Using a humidifier helps maintain optimal moisture levels.

Caring for natural stone floors requires seasonal attention, but with a structured maintenance plan, you can ensure their lasting beauty and durability. By adapting your cleaning and protection routine to each season, you can safeguard your flooring from common threats while enhancing its aesthetic appeal for years to come.

Speak with a Professional

Learn how you can save thousands of dollars by restoring your floor.

Call Us:
760-360-4000